In the previous post, you saw how to capture the easiest form of social proof. That is, weekly wins from your clients.
In this article, you’ll see how to automate weekly wins on your website.
The video on this page will take you step-by-step on how to do this.
But just in case you don’t watch the video, here’s the basic structure.
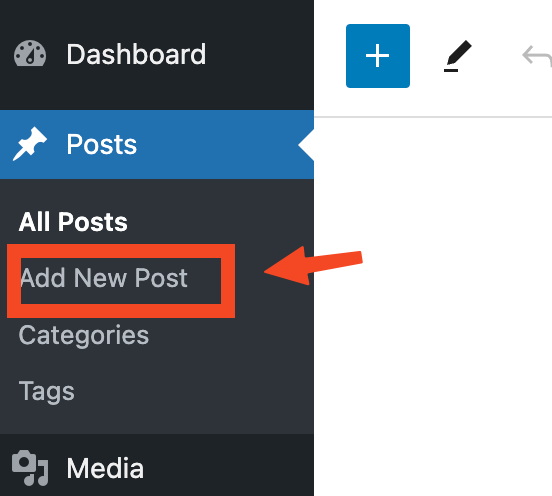
Step 1- Create A New Post Or Page On Your Website
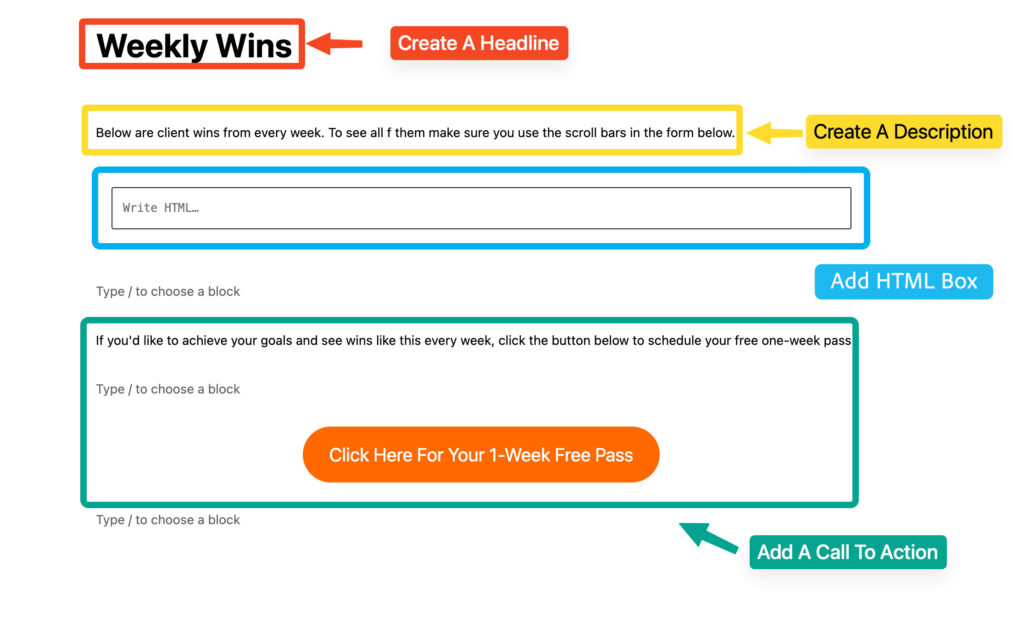
Step 2 – Add Headline, Description, HTML Code Box, And CTA
Once you create a new post (or page), you will want to give it a headline. “Weekly Wins” will work fine since this is where visitors and your clients can go to see the latest wins.
Also, add a brief description so people know exactly what the post is about.
The most important part is to add a custom HTML window to the page. This is where the code will go that will show the wins from your Google Forms.
Finally, add a call to action so people know what to do next.
Step 3 – Open Your Weekly Wins Google Form
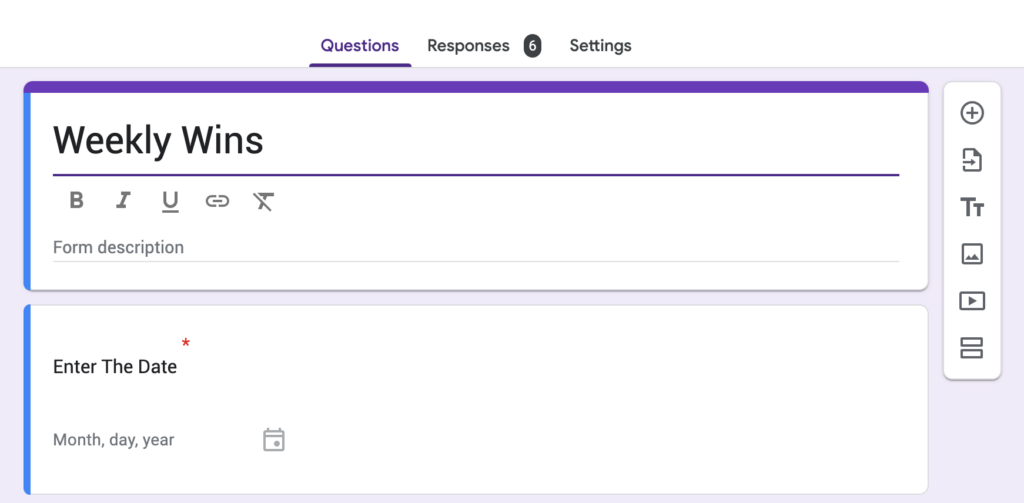
Next, open the Google Form you are using to collect your weekly wins.
Again, if you’re not sure how to create it the right way, refer back to the previous post on the simplest way to collect social proof.
Step 4 – Open The Responses
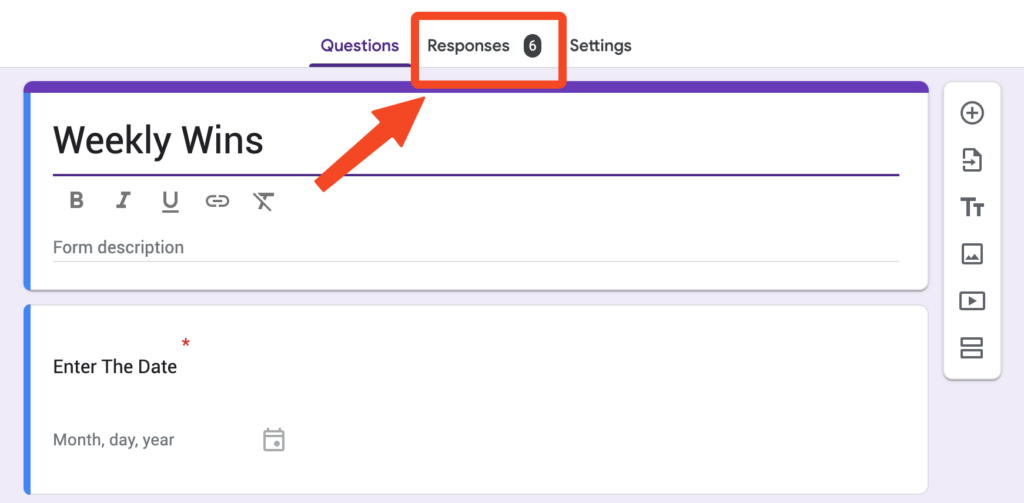
Once the form is open, click on the responses tab at the top.
Step 5 – Click “View In Sheets”
When you are in the responses tab, look to the top right and find where it says, “view in sheets.” When you see that, click that link. That will open the Google Sheet that collects all of the clients information.

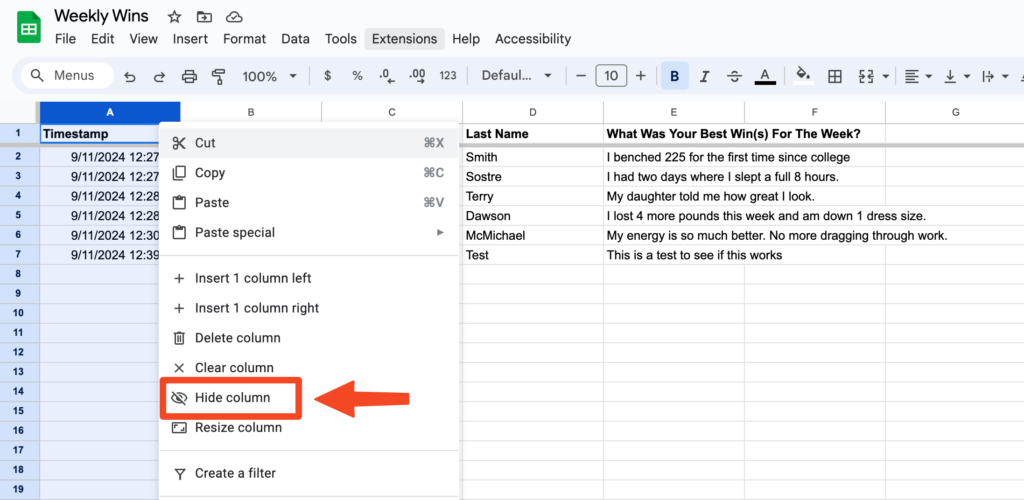
Step 6 – Hide The Timestamp Column
When you are in the Google Sheet, you will want to hide the first column that is labeled, “timestamp.” You want to do this because if you don’t, it will show up on your website. This is information that doesn’t need to be seen.
To do this, click on the drop-down area to the right of column A. Then a window will appear. Go down and click on where it says, “hide column.” That will hide the time stamp column from view.

Step 7 – Hide The Last Name Column
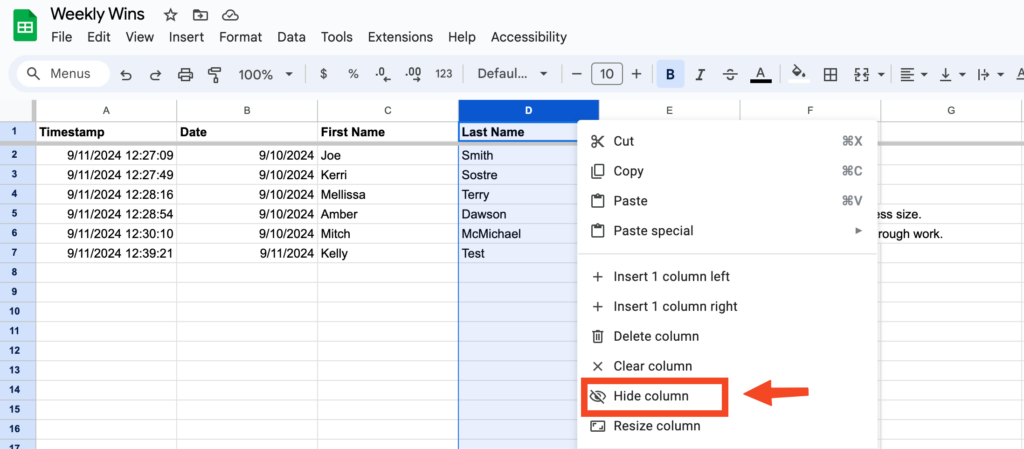
Now, repeat the same process in column D, where it says “last name.” This is optional, though. If you want to keep the client’s last name listed publicly, then you don’t have to hide it.

Step 8 – Get HTML Code
The next step is to publish this Google Sheet. You will have to publish it so you can get a code to place on your website.
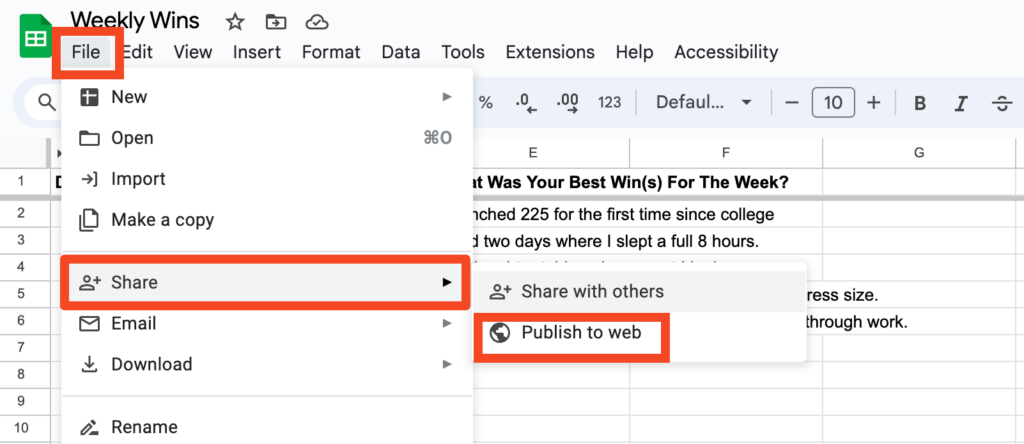
To get this code, click where it says “File” in the top menu bar.
When the window opens, click on “share,” then another window will open.
Click where it says “publish to web.”
Step 9 – Get Embed Code
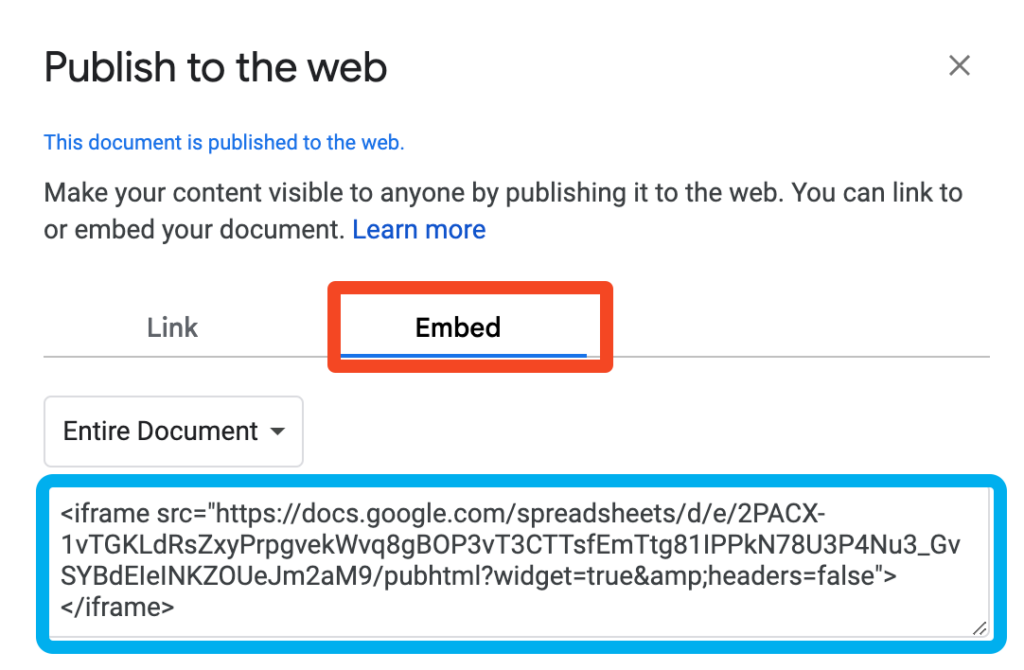
The next thing you will see is a window pop up. It may look different from what you see below. But the key is to select the tab that says “embed.”
Make sure the entire document is selected in the drop-down menu, and you’ll see the code.
Copy that code.
Step 10 – Paste The Embed Code Into Website
Now, take the code you just copied, go back to your website editor, and paste it in the custom HTML code box. Make sure to save your post/page every time you make a change.
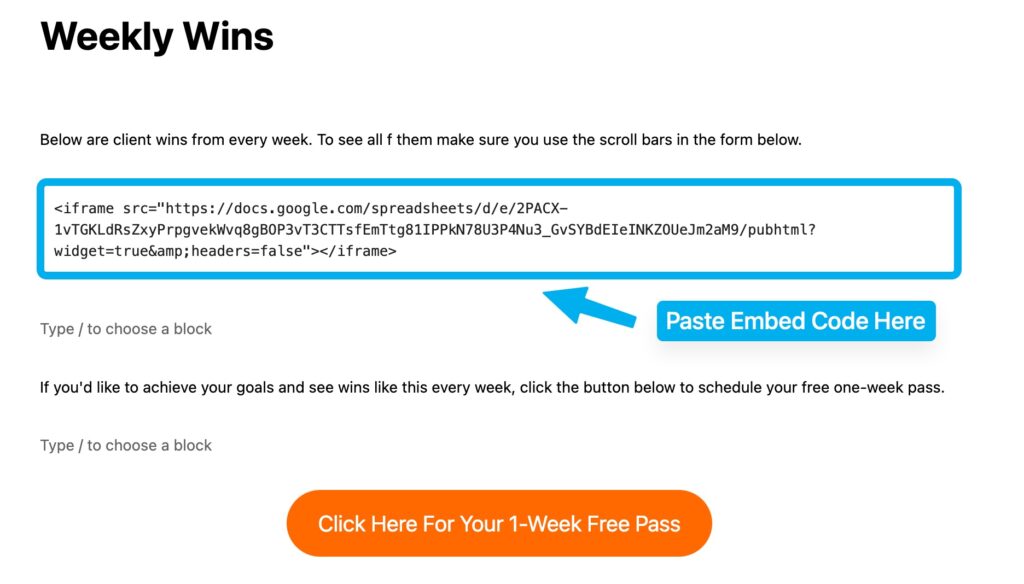
Step 11 – Delete The End Of The Code
This is the important part. To make the form look correct on your website, you’ll have to add a little code to the end of what you just pasted in there. But before you do that, you have to delete a tiny piece of the code.
Go ahead and highlight where it says “><iframe> at the end of the code. Make sure to highlight the quotation mark as well, then hit delete.

Step 12 – Paste Code At The End
Now, copy the code below, highlighted in yellow.
” width=”100%” “height=”100%”></iframe>
Then paste it at the end of the code that you just deleted in the HTML window on your website. Basically, just paste it right after the word ‘false.’ See the image below or video on this page to make sure you put it in the right place.

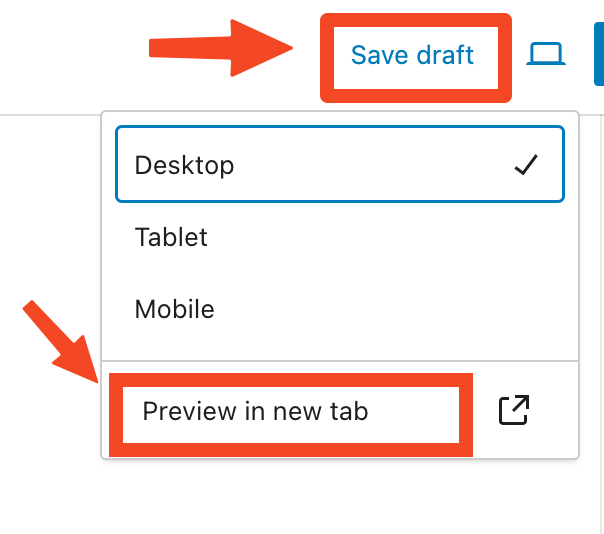
Step 13 – Save And Preview
Now, save the post/page again, and then preview it.
Step 14 – Final View
If everything is done correctly, your post/page will look something like what you see below.
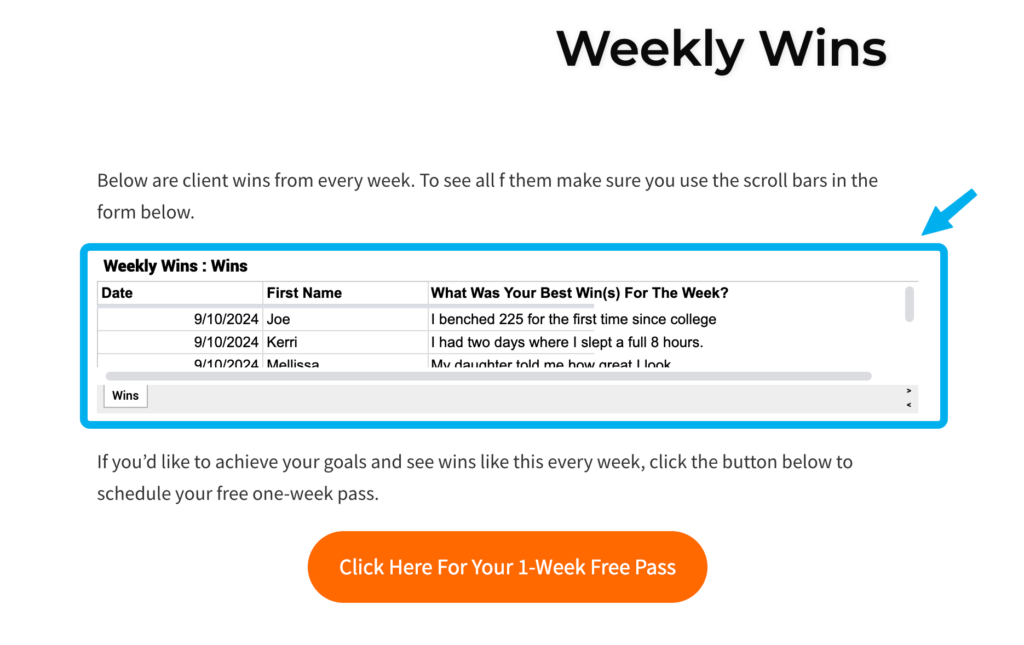
And that’s it. Now you have a page on your website that will automate your weekly wins that your clients post.
Make sure to share this page with your clients so they can see what everyone else is accomplishing.
Also, make sure to send leads and prospects to this page as well.
If you really want to make the page stand out, add written testimonials and video testimonials to it as well.
And if you need help collecting those written or video testimonials, click the button below and I can help you with the entire process.