In the previous two automated weekly wins videos, you saw how to collect this type of social proof and how to automate the process for all the wins to show up on your website.
If you didn’t see those, make sure you go through those first, or else what you will see below won’t make any sense.
In this article, you’ll see the step-by-step process of how to filter out individual client wins from all of the submissions and how to showcase them.
We will do it in two ways.
The first is by creating individual client tabs on the main client wins spreadsheet.
The second is adding the wins from an individual client on their own testimonial page.
Watch The Video Below On How To Do This
Here Is The Written Breakdown On How To Do This
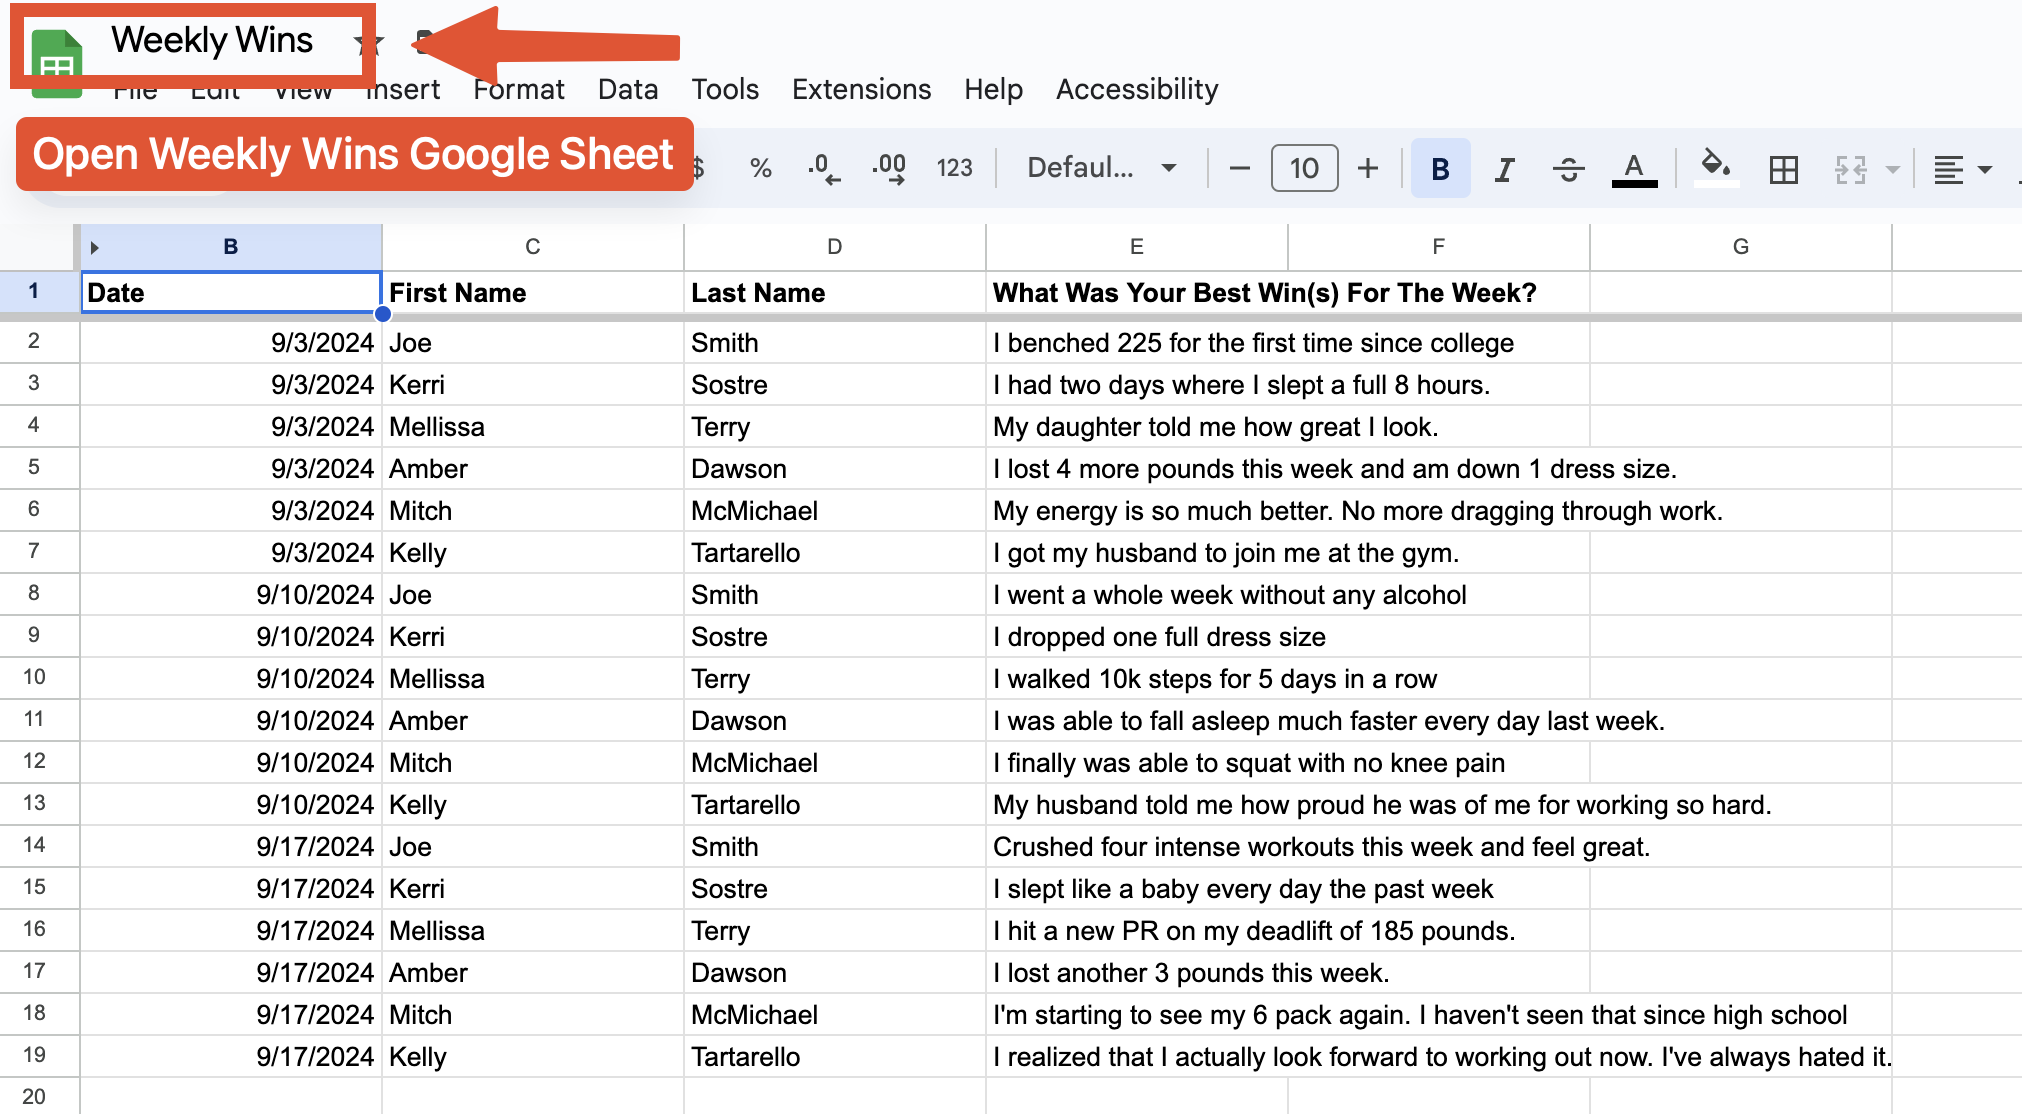
Step 1 – Open Your Weekly Wins Google Sheet
If you don’t know how to find or get this Google sheet, refer back to article 1, which shows how to set everything up.
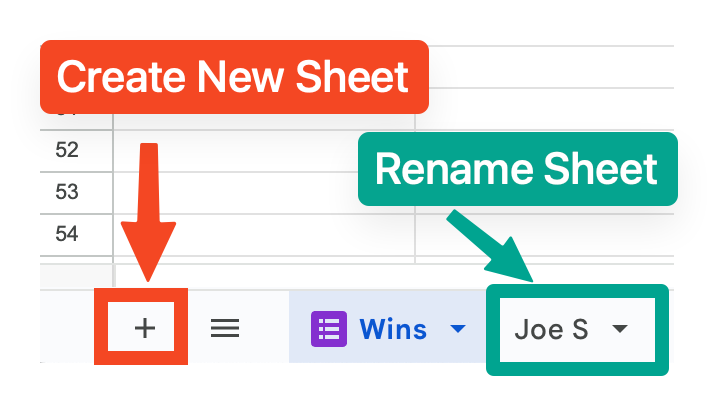
Step 2 – Create A New Sheet And Rename It
At the bottom left of the main weekly wins sheet, click the plus (+) button to create a new sheet.
Once it’s open, right-click the tab and rename it with a single client’s name. In this example, Joe S.
When you are done with the steps below, this sheet will show only Joe’s results and no one else’s.
Step 3 – Double Click Cell A1 And Paste Formula (Most Important Step)
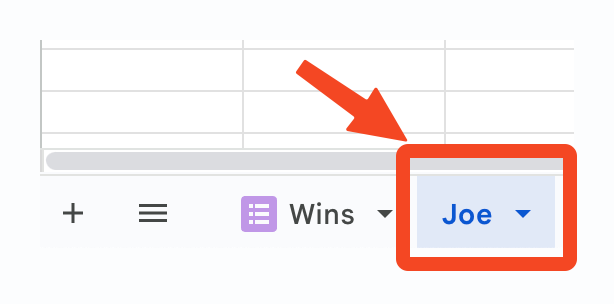
Make sure that your individual sheet (Joe S) is selected.
**Now, this is the important part.**
You have to enter a formula to tell this sheet which clients wins you want to see.
I highly recommend watching the video on this page to make sure you understand this part and get it right.
What you have to do is copy the entire code below…
=QUERY(Wins!B:E,”select * where D Contains ‘Smith‘”)
Once copied, go to cell A1, double-click that cell, then paste the formula into it.
The next step is CRUCIAL!!!
Once the code is pasted into cell A1, go to where you see “Smith” and change that to the last name of your client.
Smith is just a place-holder for this example.
For you to see your own client, you have to make sure to include your client’s last name.
So if your client’s last name is Allen, the code will want to look like this…
=QUERY(Wins!B:E,”select * where D Contains ‘Allen‘”)
Make sure when you do this that the capitalization of their last name is correct, and to add the last name between the apostrophe marks.
If you don’t add the name between the apostrophe marks, it won’t work.
Once you’ve updated the code with your client’s last name, then hit enter or return on your keyboard.
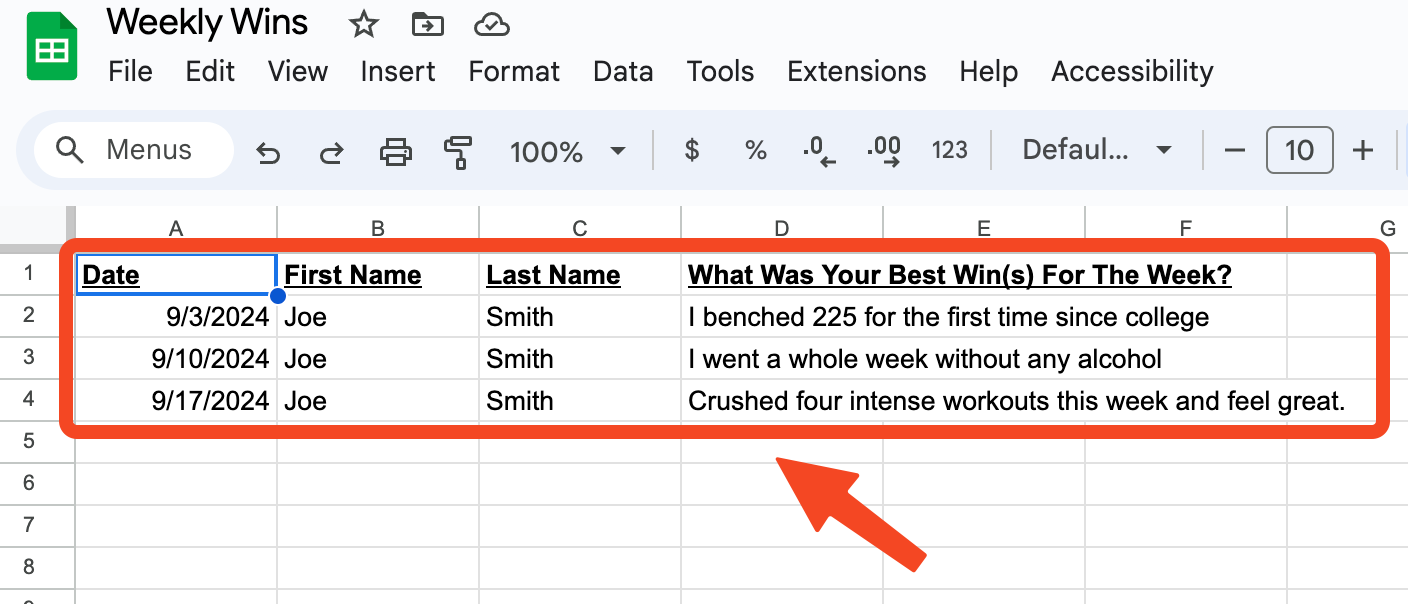
Step 4 – This Is What It Will Look Like When Done Correctly
When the formula is entered correctly ,it will show only the results from that specific client.
Step 5 – Create A New Sheet For Other Clients And Repeat The Process
If you want separate sheets showcasing results from other individual clients, then simply repeat steps 2 and 3 from above.
Make sure to change the client’s last name to the one you want when pasting the formula into a new sheet.
Step 6 – Publish The Individual Client Wins On Your Weekly Wins Website Page
In the previous article, you saw how to publish ALL the weekly wins to your website.
Go back to that article to see all the in-depth steps to set this up if you haven’t already.
That’s because step 6 won’t cover everything; it will only explain the steps that are in line with this article.
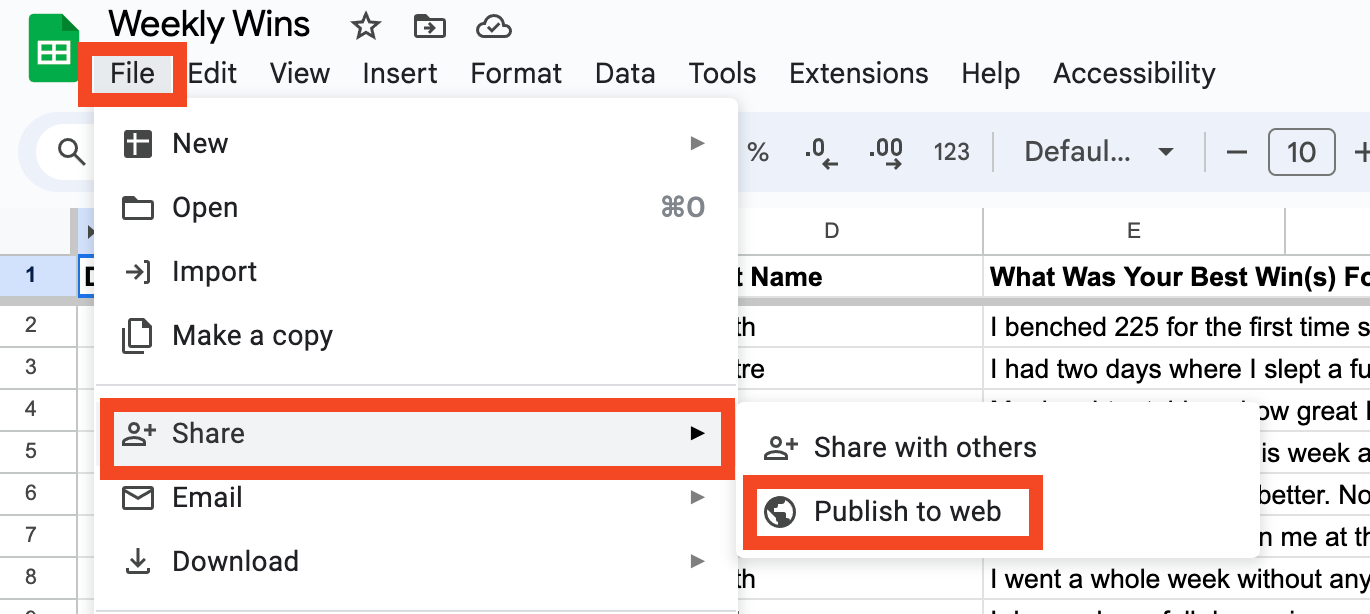
But once your page is set up, go to your ‘Weekly Wins’ Google sheet ‘share.” Then select ‘Publish to web.’
Step 7 – Get Embed Code And Copy It
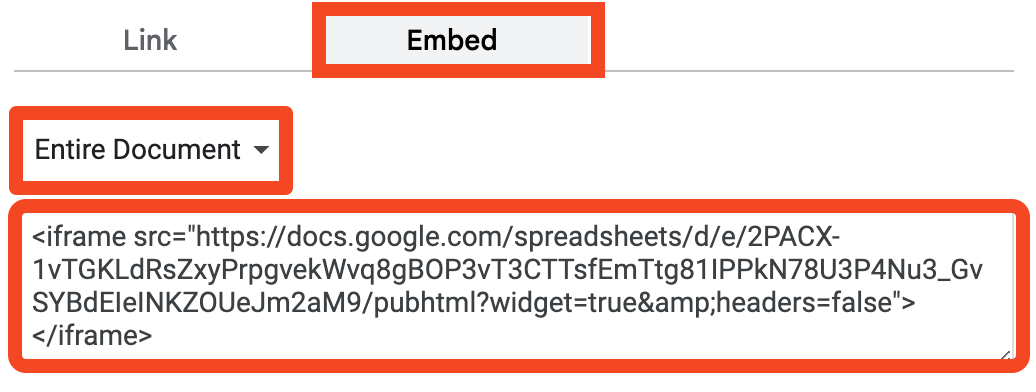
You should see a pop-up image after you selected ‘Publish to web.’
Click on the ’embed’ tab.
Make sure ‘Entire Document’ is selected.
Then copy the code you see.
Step 8 – Embed Code Into Your Weekly Wins Page On Your Site
Go back to your ‘Weekly Wins’ page on your website.
Once there, you want to make sure a custom html element is added. If you already have that page set up following the steps from the previous article, then the HTML element should already be there.
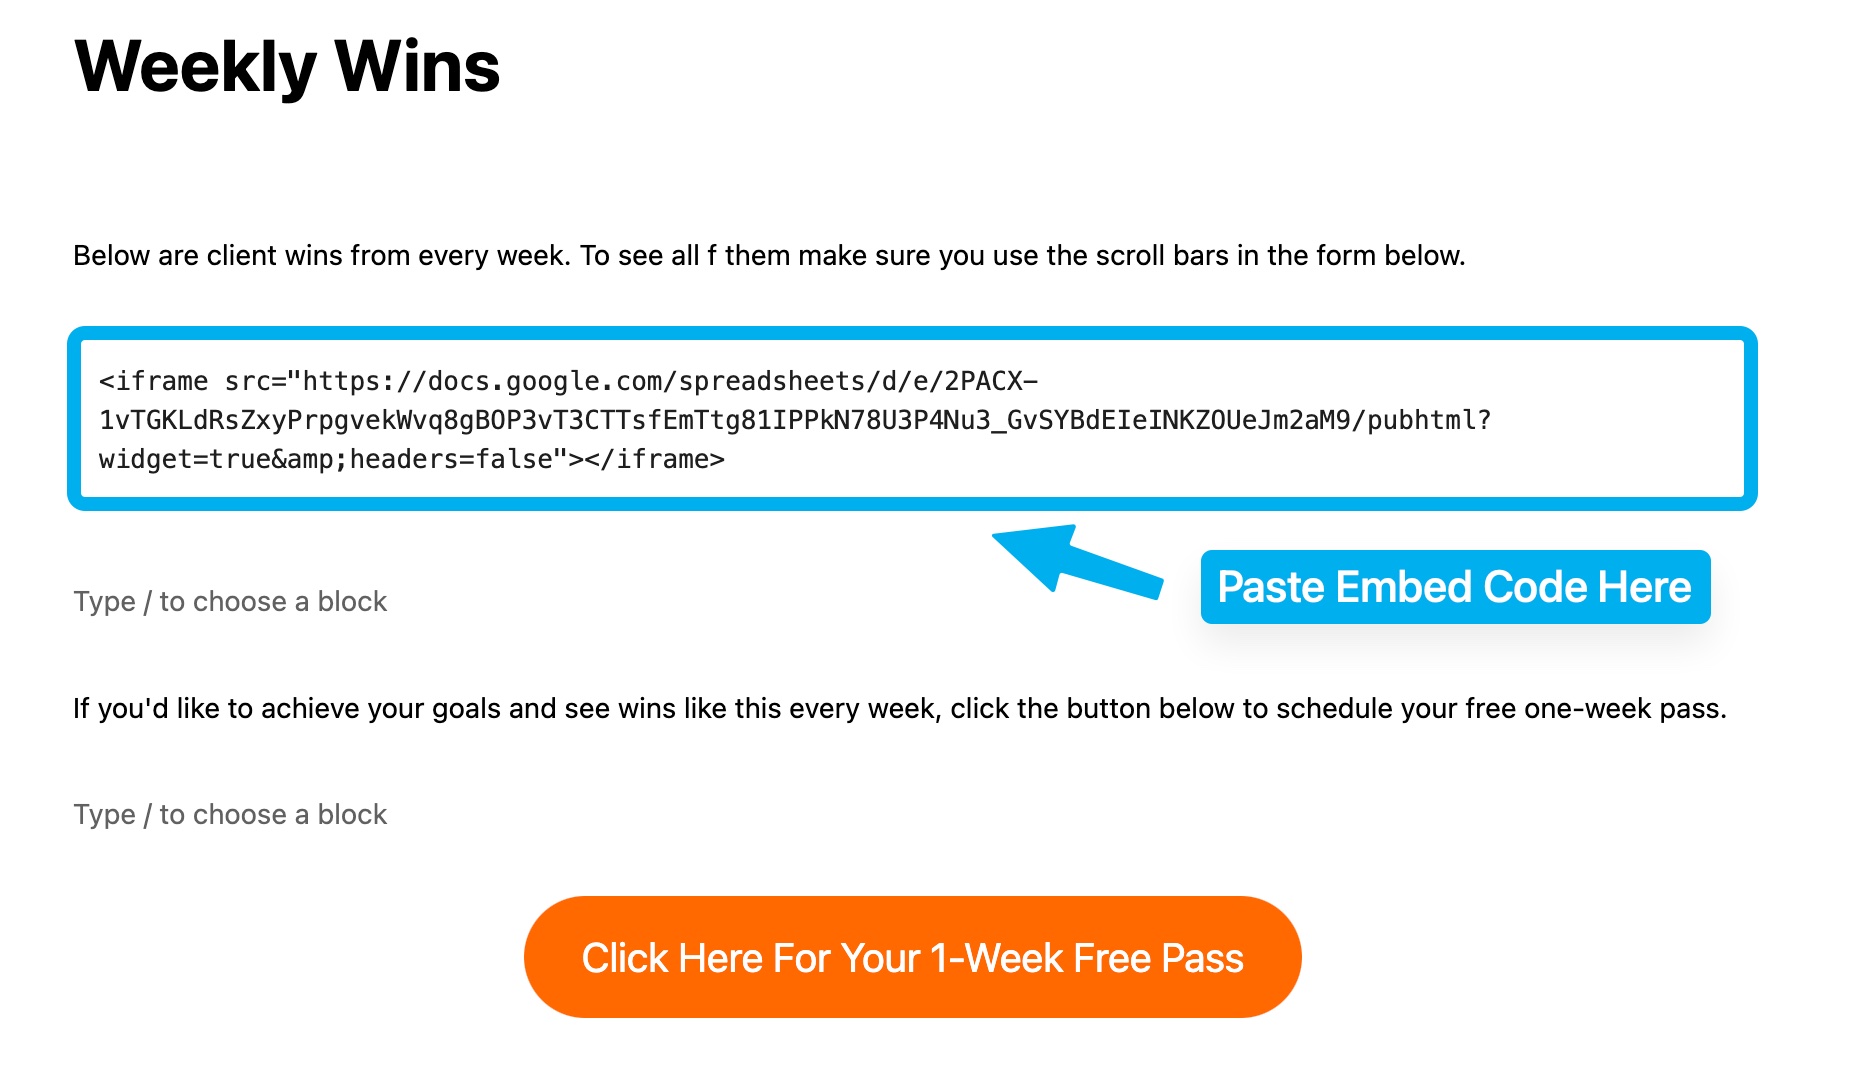
It’s in that custom html element where you paste the embed code you just copied.
Step 9 – Delete The End Of Code
Once the embed code is pasted into the custom html element on your “Weekly Wins” page, you then want to delete everything after the word false.

Step 10 – Copy/Paste The Resize Code
Once you deleted that part of the code, you now want to copy the code below.
” width=”100%” “height=”100%”></iframe>
Once you’ve copied the code, you now want to paste it right after the word false. This will resize everything, so it makes the results easier to see.

Step 11 – Save And Preview
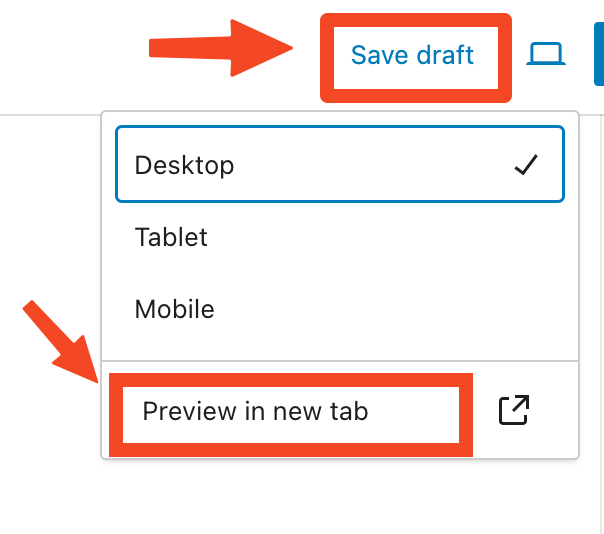
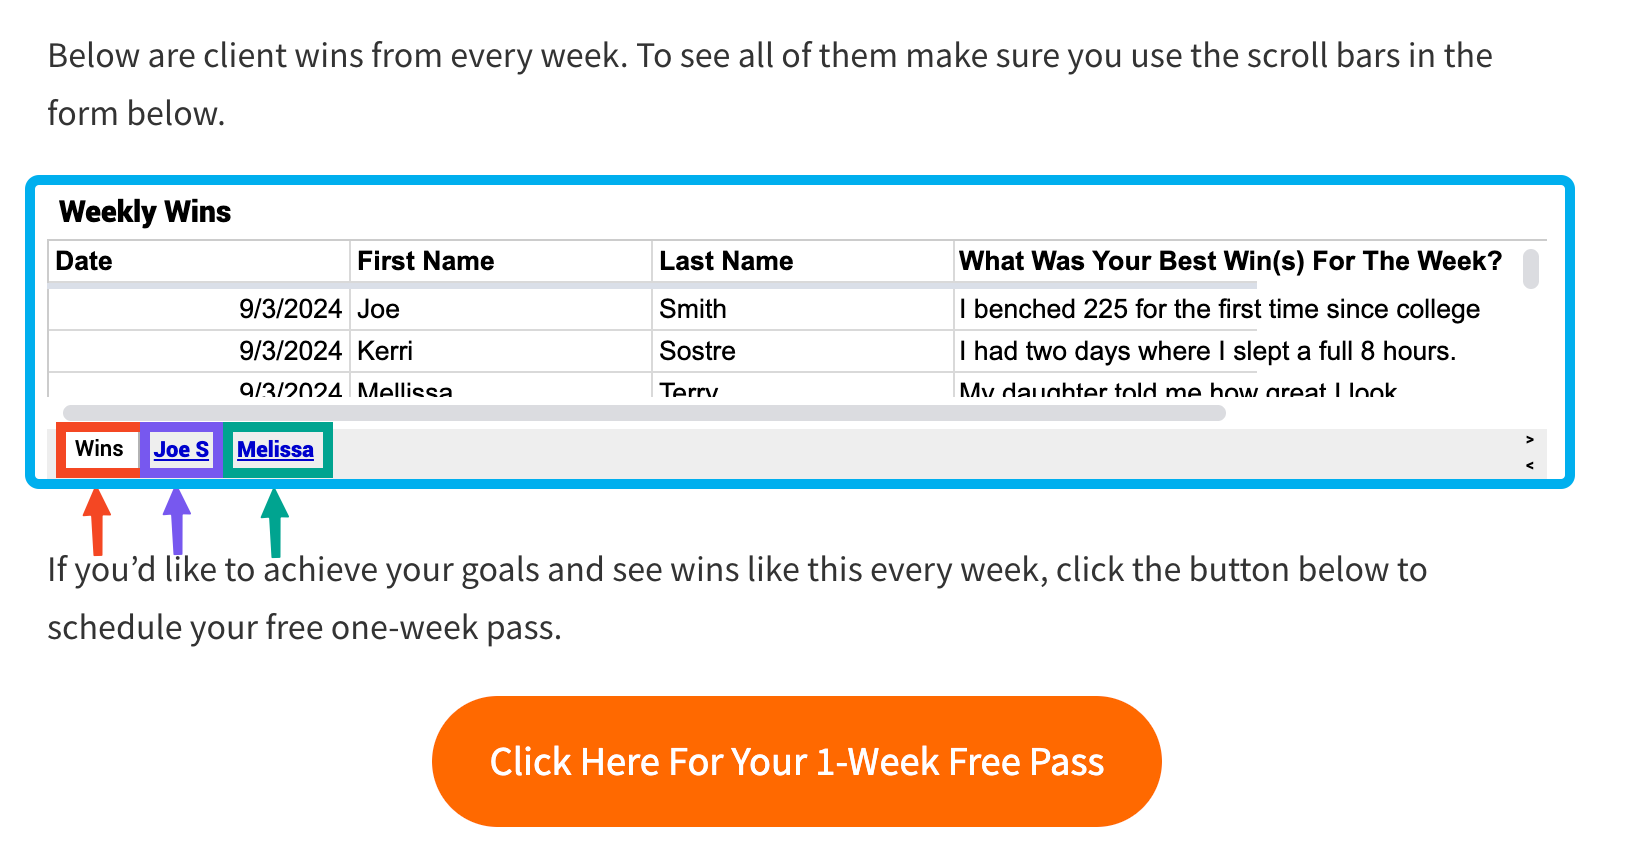
Step 12 – What The Page Should Look Like
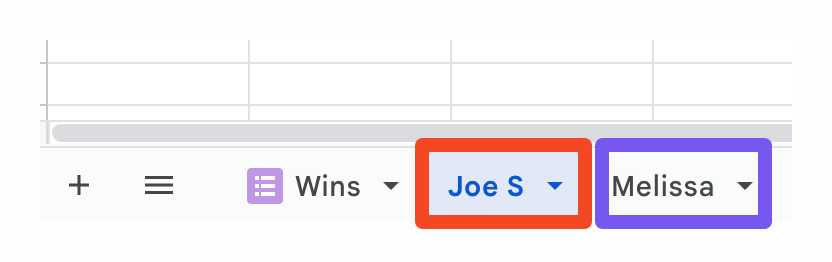
When everything is all said and done, the weekly wins will show up. It will also now show the individual sheets for each client at the bottom.
When a visitor clicks on a person’s name, they will see only the wins for that person.
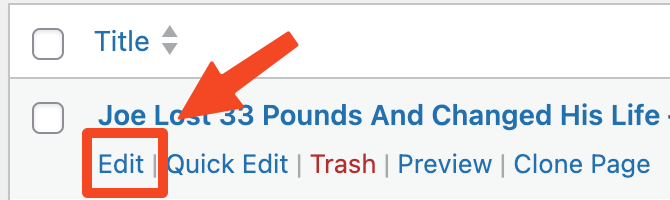
Step 13 – Create/Open Individual Client’s Website Testimonial Page
To take this one step further, you will want to add the individual client wins to their testimonial page.
If you don’t have a specific testimonial page for one of your clients who have shared their weekly wins, I highly recommend that you create one.
If you already have one, then open the page so you can edit it.
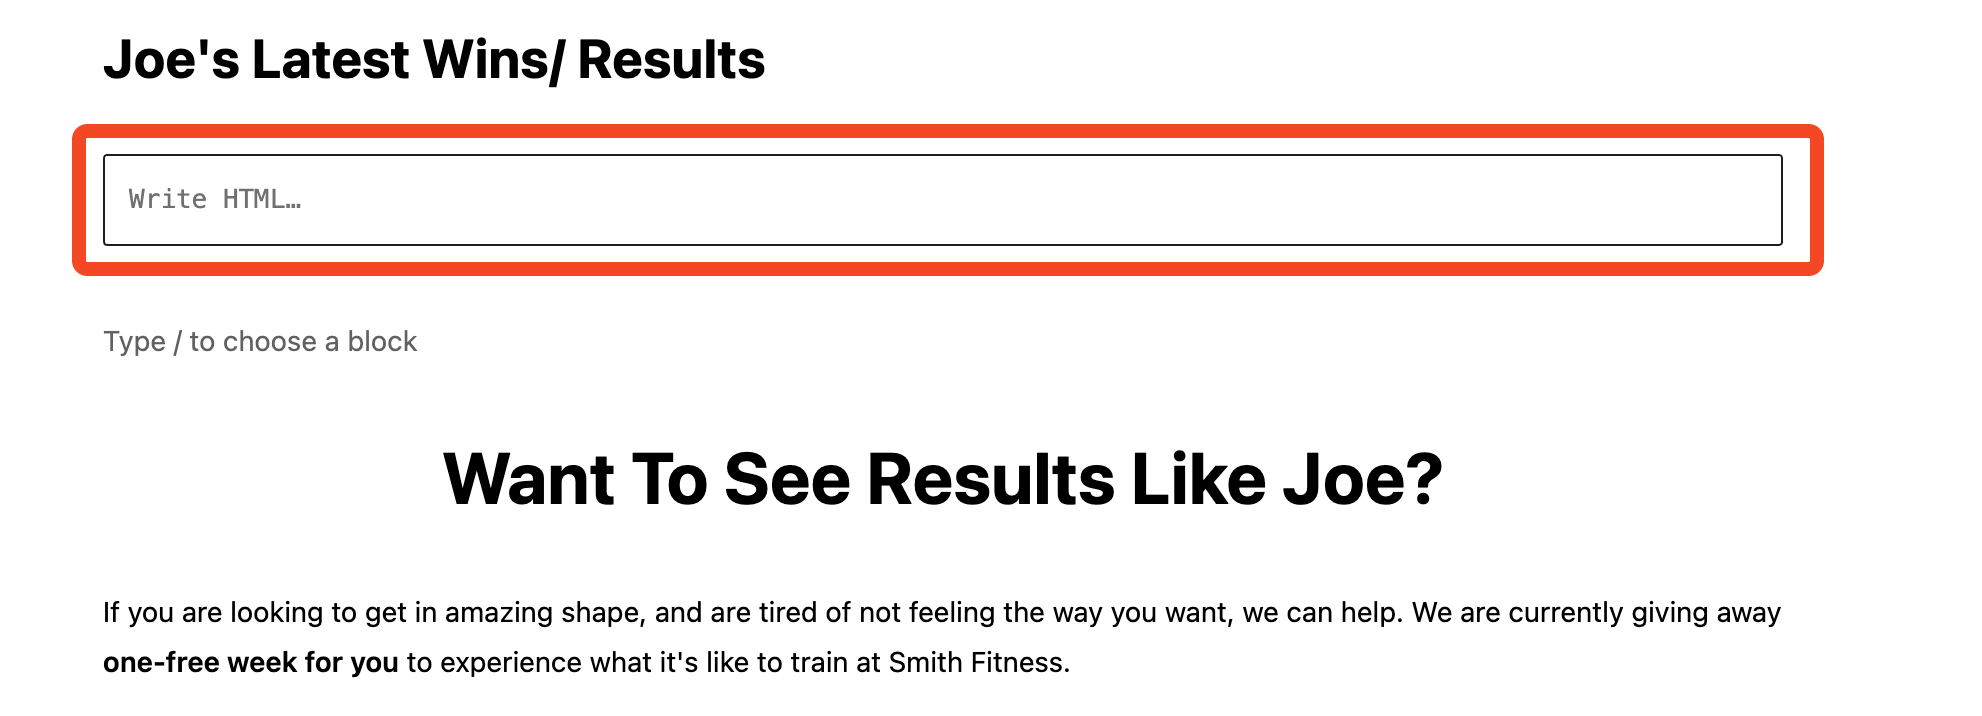
Step 14 – Add Custom HTML Element And Save The Page
Just like for the weekly wins page, you will want to add a custom HTML element to this page.
Step 15 – Get Embed Code And Copy It
Now, all you have to do is get the embed code again. See steps 6 and 7 above on how to get to the embed code.
But this time you have to get the code for the individual client, not the whole wins document.
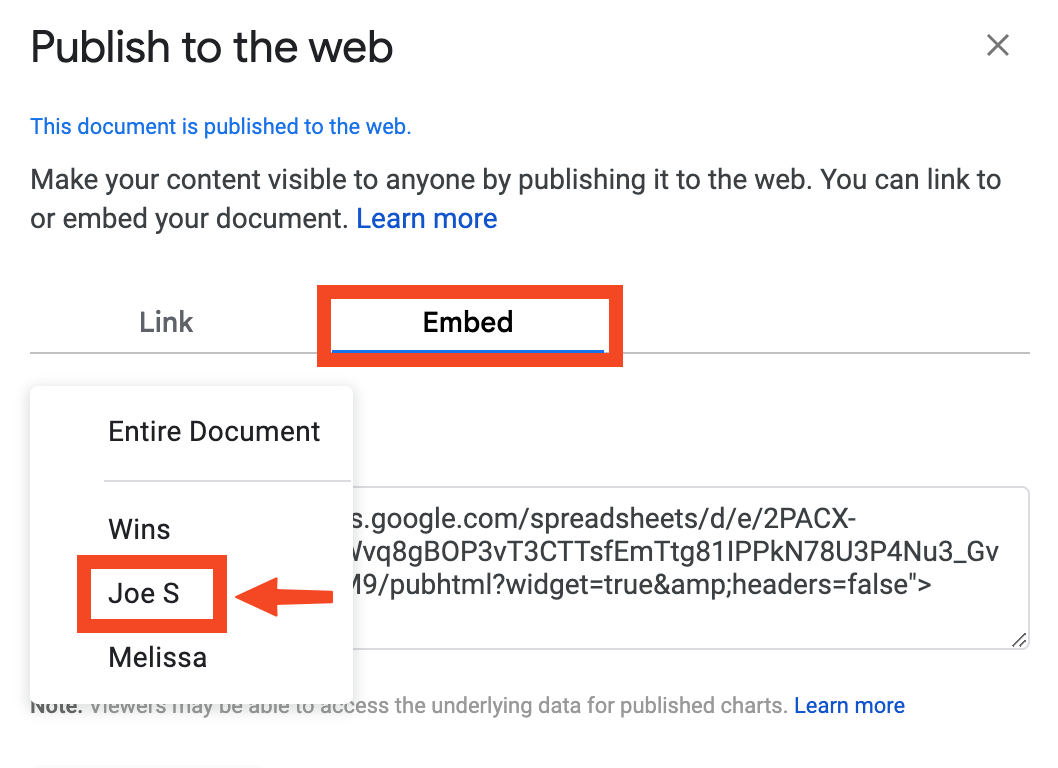
So when the ‘Publish to the web’ pop-up appears, click where it says embed.
Then click the dropdown tab where it says ‘entire document.’
Select the client you want, in this case Joe S.
And then copy the code that is there.
Step 16 – Repeat Steps 8-11 Above.
Once you have the code, now you want to embed it on your clients individual testimonial page.
Then delete the end of the code and paste the resize code (Steps 9 and 10) to make it look better.
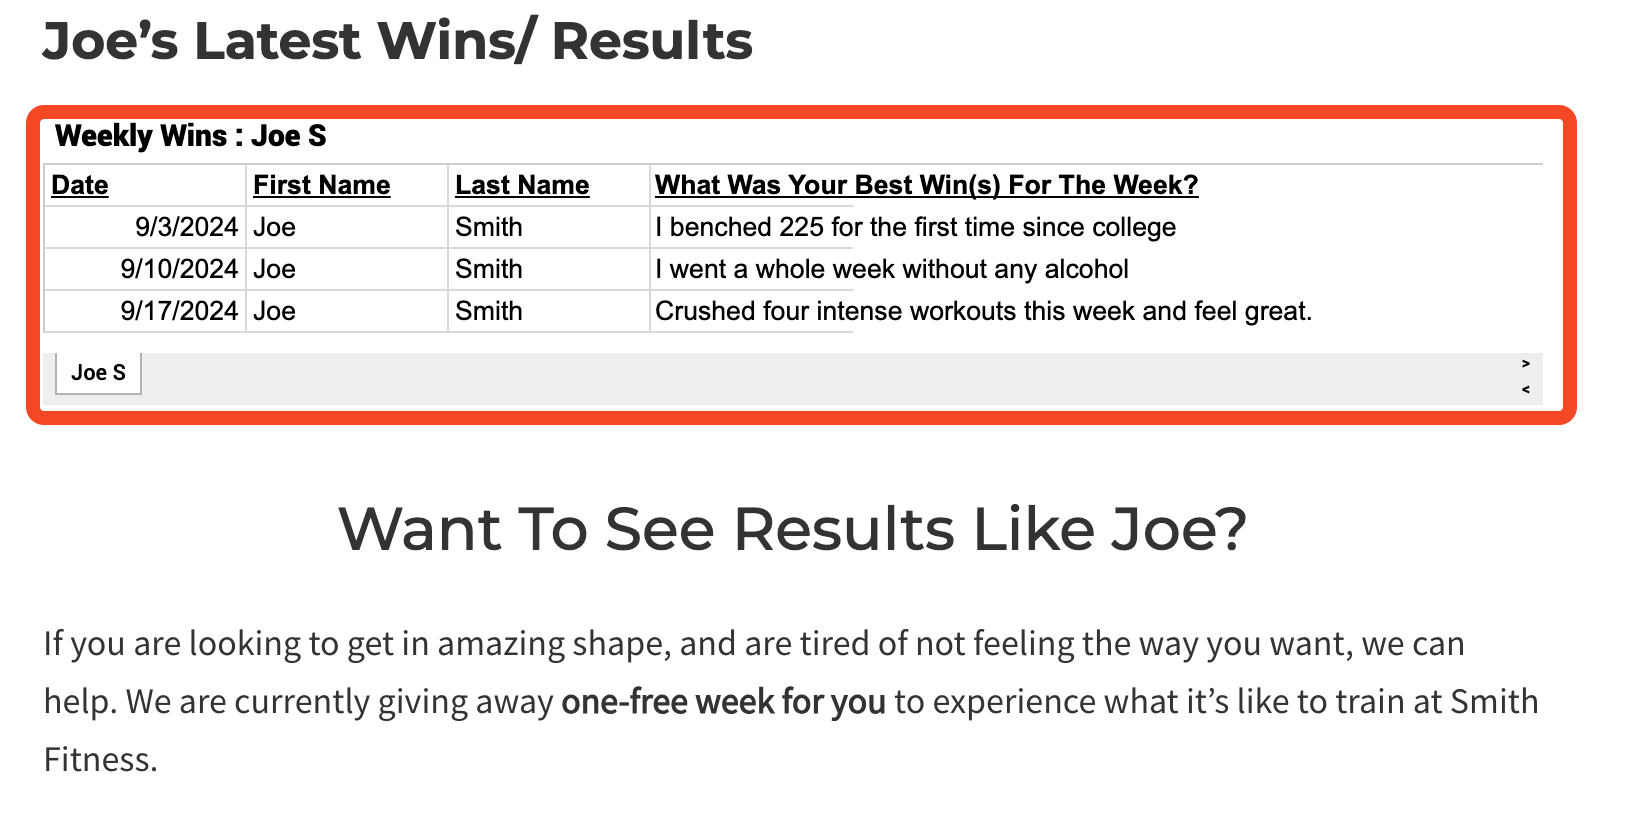
Once that’s done, hit save, then preview.
And your page will look something like this.
Lastly, if you notice that results are not showing or you are seeing errors on your Google sheets or on your websites, here are a few things to check.
- Make sure there are no unnecessary spaces when you are pasting the code.
- Make sure last names are entered correctly with correct capitalization.
- Make sure the pasted code is not missing anything like apostrophes, parenthesis, etc.
- Make sure you website pages are updated and saved.
- Give Google a few minutes to update the results if you made changes to the weekly wins sheet.
If all the steps are followed above, then everything should work without any issues.
So that’s how you get automated weekly wins for individual clients and then add them to your testimonial pages.
Again, make sure to share this page with your clients, as well as with your audience to get the most out of it.
If you need any help collecting other forms of social proof, whether it’s reviews, written testimonials, or video testimonials, click below and I’ll take care of everything for you.